Sending DHT22 readings from a Raspberry Pi Zero to MQTT
I spent a couple of hours last weekend getting a RaspberryPi Zero (W) up and running as a home automation node, joining my existing fleet of MySensor Arduino nodes. The Raspberry Pi is being used instead of an Arduino as it is eventually going to perform a number of functions along with climate sensing - for example, bluetooth presence detection for room-based location.
I found a number of resources documenting how to do parts of the system that I cobbled together, but not an overview of the entire thing - that’s what this post, and https://github.com/joshmcarthur/raspberrry-pi-dht22 is intended to be.
1. Hardware
I used a RaspberryPi 0 (W). The W means it has onboard wifi and bluetooth. I’ve had no problems with connectivity and the hardware itself is looking super stable. I got the RaspberryPi boards of Aliexpress, so there’s no telling if they’re official or not. They were around NZD$20 each from memory.
The DHT22 sensors I got in a 5 pack a few months ago to eventually replace the DHT11 sensors I have on my Arduino nodes. Also from Aliexpress.
2. OS
I’m using Raspbian Stretch Lite on the Raspberry Pi board. I run all of the home automation stuff that I can in Docker (which now has official support for ARM boards, the Raspberry Pi in particular), using docker-compose as a lightweight container manager.
While there is an overhead associated with running containers in Docker, I find that it is useful to establish separation of concerns and boundaries between different tooling for different tasks. It’s not necessary to use Docker for this, but my repo does include a working Dockerfile and docker-compose.yml.
3. Wiring
The wiring for these sensors is pretty simple. See https://pinout.xyz for a pin layout of the Raspberry Pi GPIO pins, but the wiring is simple - 3.3v from the bottom left corner of the GPIO goes to the left hand pin, ground from the bottom right corner of the GPIO goes to the right hand pin, and the data pin is connected to GPIO4. The data pin is the second from left (the remaining pin on the DHT22 is unused for most use-cases), and GPIO is 4th from the left on the bottom row of the GPIO pins.
I found many forum posts that suggested that a resistor should be placed within this circuit, however I found that I was able to get readings without one. GPIO4 in particular does have a pull-up resistor that may have been sufficient to work with, so other GPIO pins may not work as well.
4. The Python script
I’m using Adafruit_Python_DHT to communicate with the DHT22 sensor. This library is Python with a small C component for GPIO integration that abstracts over the actual sensor reading. I initially tried to just use the example script built into this library, but I found that having the output serialized for humans wasn’t particularly easy to convert into an MQTT payload. Instead, I used the same API that the example script uses, but I serialize the message into a JSON datastructure. Errors are logged to STDERR so that they can be logged without accidentally piping error messages into MQTT.
5. The bash script
The bash script glues everything together. It runs a while true loop with a sleep-based delay that
calls the Python script, checks it succeeds, parses the JSON to extract the temperature and
humidity, and sends this data to MQTT. This script should work for most purposes, but this is also
where most of the ‘me-specific’ configuration lies.
6. Tying it all together: docker-compose
The Docker image is Alpine linux based, and is just over 200mb when built (I haven’t optimised
this particularly). The image installs Adafruit_Python_DHT via a git clone, and then replaces
a shebang that is hardcoded to expect Python in a particular path that is mising in the Python base
image. It then adds the Python and bash scripts and sets up the polling script as the CMD (so this
will run by default if no other command is given).
The docker-compose file mostly just mounts the current working directory in /opt/dht22 so that the
poll and python files can be revised easily. The docker-compose.yml file also instructs the
container to be restarted if it fails for any reason (restart: always) - this will also cause the
container to be started on boot. For GPIO access, privileged: true is the easiest way to allow the
container to communicate with the GPIO pins, although there are alternatives if you’re using your
Raspberry Pi in a secure environment. Finally, there are a couple of environment variables that
define the IP address of MQTT and the topic to publish to.
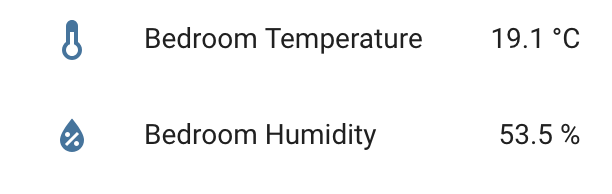
7. Result!
With a quick MQTT Sensor configuration in HomeAssistant, the sensor shows up!