Speeding up TimeMachine backups
TimeMachine is an incredibly smooth backup solution for Mac OS, but it can be a little slow, especially for initial backups or incremental backups that have a large amount of changes (such as a VM image being added to your filesystem or the typical I/O killer, many small files).
I recently performed a TimeMachine backup to a brand new 1TB portable hard drive, and was alarmed at the planned time to complete - 19 hours for 130GB. Here are some tweaks I found to speed things up:
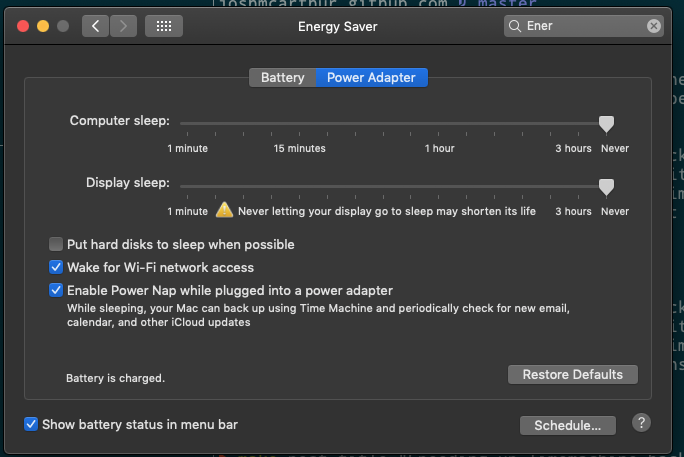
1. Prevent Mac from sleeping
Left to it’s own devices, Mac OS will typically sleep after a period of inactivity. This can place TimeMachine backups AND disks in a slower state. While the backup runs, it is worth adjusting Energy Saver settings to never sleep the computer or display:
There is also a handy app called Caffeine that allows toggling on and off of sleep.
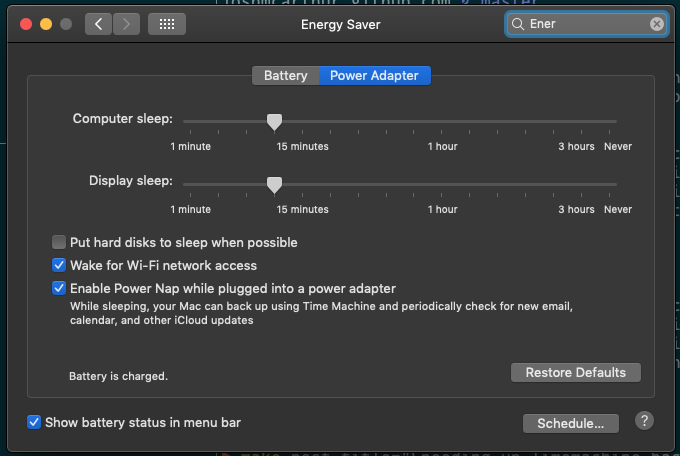
2. Disable “Put hard disks to sleep when possible”
Not all disks support this, but keeping both the portable drive and system drive active is obviously beneficial to TimeMachine backup. This toggle can also be found in the Energy Saver preferences:
3. Ensure Spotlight is not indexing the TimeMachine drive
Spotlight is the indexing service built into Mac OS - by default, it crawls and indexes content on your computer to use when you hit the ‘Search’ icon in your menu bar (or hit Cmd-Space). The problem is that indexing is quite I/O intensive, so this can cause a real slowdown. On a newer disk, I believe Spotlight may also begin indexing the Timemachine backup itself before the backup is complete (there is a warning if you try and exclude the Timemachine backup disk once the initial backup is done, but I did not see a warning when I excluded the Timemachine disk before the initial backup).
To exclude your Timemachine disk from indexing, go into System Preferences -> Spotlight -> Privacy, click the Add (‘+’) button, and select your Timemachine disk from the sidebar in finder. You can also drag and drop the drive into this list.
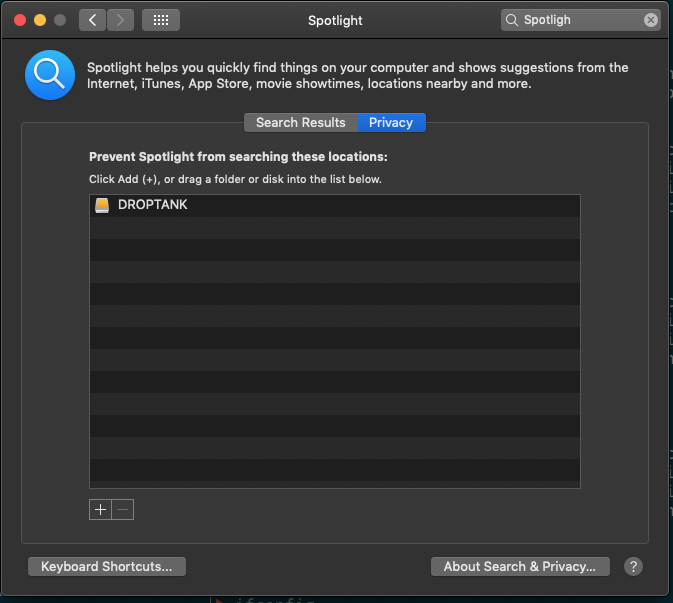
Once you’ve made this change, you may want to restart your computer to make sure that both Spotlight and TimeMachine recognise this change.
4. Temporarily disable low priority service throttling
Mac OS has a concept of low-priority services. TimeMachine is lumped into this category, since in normal operation backups should just run in the background without taking up more resources than absolutely necessary. While you’re doing an initial backup though, you kind of want TimeMachine to have all the resources it needs to do it’s job a bit faster.
Low priority throttling can be disabled using a sysctl flag via a Terminal. To get to a Terminal,
hit Cmd-Space, and type in ‘Terminal’ without quotes. The terminal will open - an empty screen with
a prompt. The command to run here is sudo sysctl debug.lowpri_throttle_enabled=0. When you run
this command, you may be presented with a disclaimer-like warning and you will be prompted for your
computer password - type it in (note that the characters will not be shown), and hit enter to apply
the setting.
In the same terminal window, you can now run sudo sysctl debug.lowpri_throttle_enabled to see the
status of the throttling. It should say debug.lowpri_throttle_enabled: 0. If it does not, go
back and try adding a -w to the command - sudo sysctl -w debug.lowpri_throttle_enabled=0, as
some older versions of OS X seem to require this for the setting to stick.

With this setting enabled, TimeMachine will no longer be throttled and will be free to use all the system resources it can. You’ll most likely now see TimeMachine appear in the list of apps ‘Using Significant Energy’ - this is great, as significant energy also equals significant system resources.
Also note that this setting only lasts until your computer is restarted. To clear the setting, you
can either follow the instructions above, but set the setting to 1 instead of 0, or you can
simply restart your computer.
With these changes, my initial backup of 130GB completed in 8 hours overnight, instead of the initial TimeMachine had planned, where after several hours it had backed up just 2GB. YMMV, but the tips above should all contribute to a faster backup process. Don’t forget to switch these settings back to their original values when your backup is complete, since the incremental TimeMachine backups are fast and don’t use much resource.